Upload Files That Are in Use

If a file is in use while S3 Sync is trying to upload it, there will be an error. One way to get around this is to use Windows built in functionality of Shadow Copy. This technology creates a read-only point-in-time copy of the volume. S3 Sync can be commanded to upload files from this volume.

Below is a PowerShell script that mounts a drive as a Shadow Copy, creates a symbolic link to that Shadow Copy, runs S3 Sync to upload files, then removes the symbolic link and Shadow Copy volume.

$sourcedrive = "E:\"
echo "sourcedrive=$sourcedrive"

$mountfolder = "E:\shadow copy"
echo "mountfolder=$mountfolder"

echo "Creating the shadow copy"
$shadowid = (Get-WmiObject -List Win32_ShadowCopy).Create("$sourcedrive", "ClientAccessible")

echo "Getting the newly created shadow copy"
$shadowobject = Get-WmiObject Win32_ShadowCopy | Where-Object { $_.ID -eq $shadowid.ShadowID }
$devicepath = $shadowobject.DeviceObject + "\"

echo "Creating symbolic link, calling cmd /c mklink /d $mountfolder $devicepath"
cmd /c mklink /d "$mountfolder" "$devicepath"

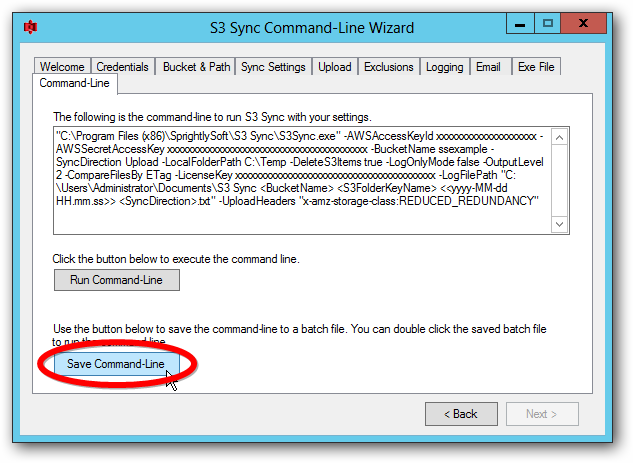
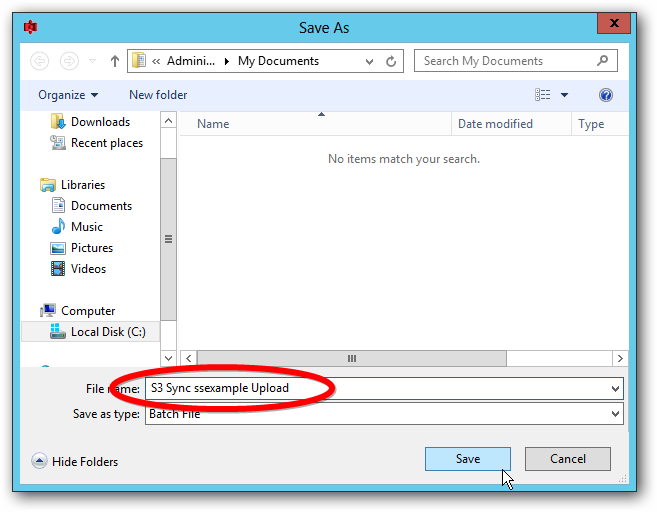
$s3batchfile = "C:\Users\someuser\Documents\Upload with shadow.bat"
echo "Running S3 Sync batch file, calling cmd /c $s3batchfile"
cmd /c $s3batchfile

echo "Removing the symbolic link, calling cmd /c rmdir $mountfolder"
cmd /c rmdir "$mountfolder"

echo "Deleting the shadow copy"
$shadowobject.Delete()

To use this script put the code in a file with the .ps1 extension. For example the name can be ShadowCopyUpload.ps1.

Modify the $sourcedrive and $mountfolder values to match the drive letter where you will be uploading files from.

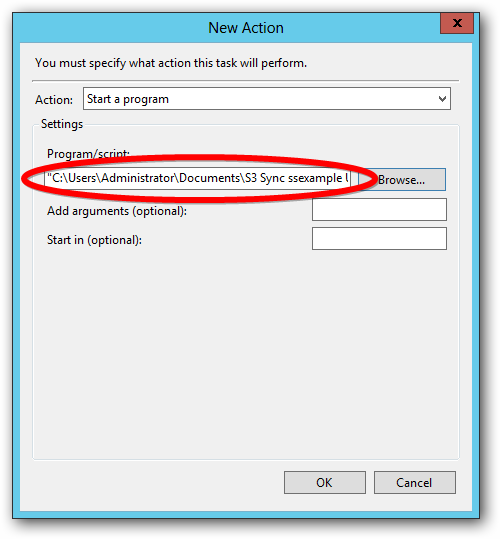
Modify the $s3batchfile value with a path to an S3 Sync batch file. This batch file should contain the command S3 Sync will use to upload from the mount folder.

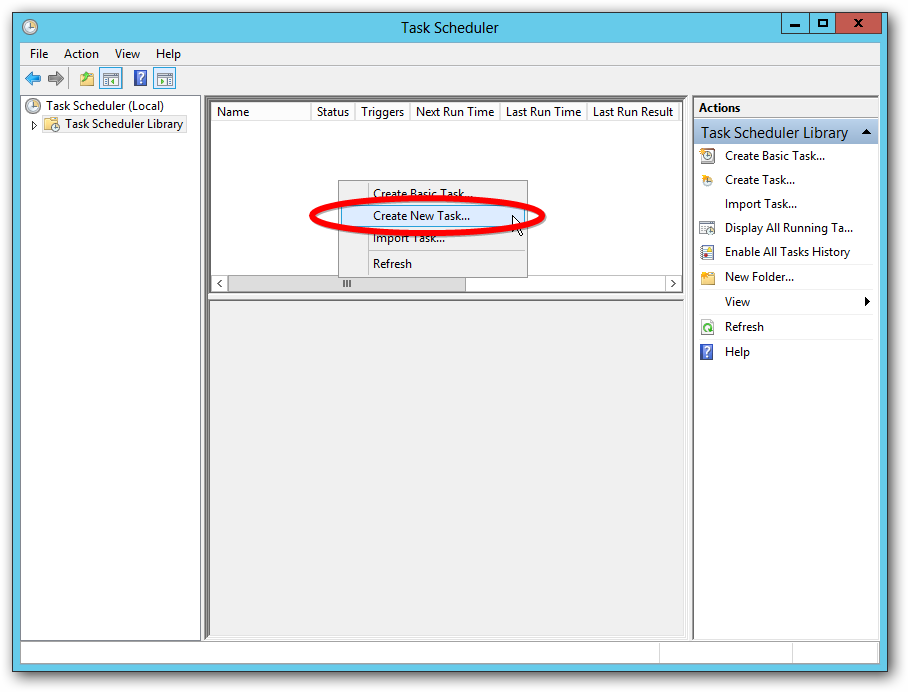
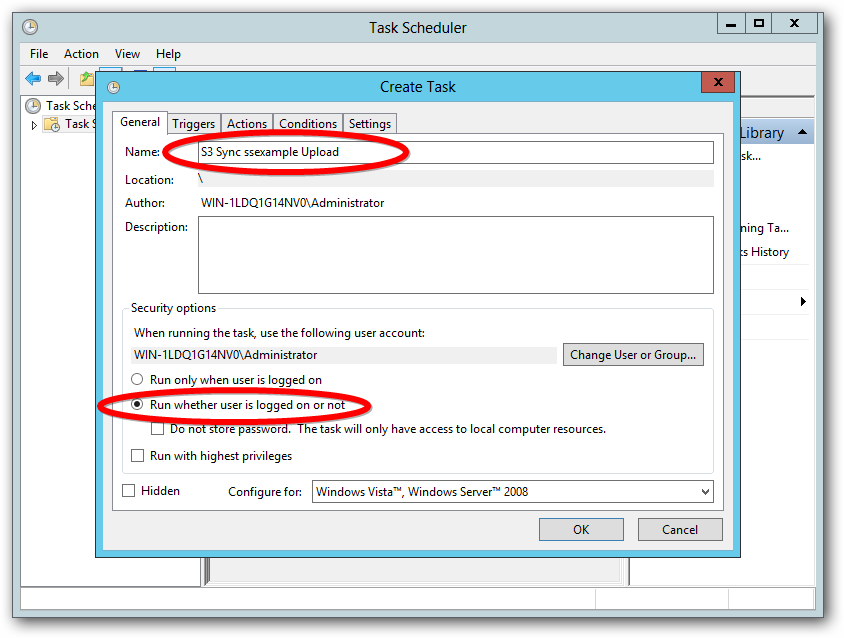
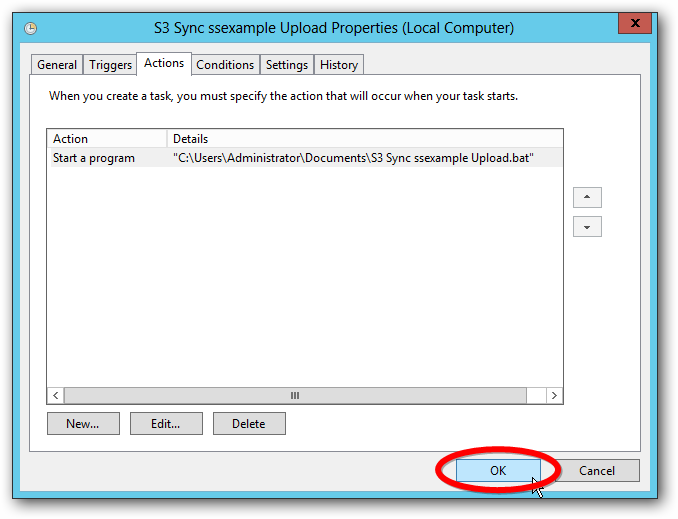
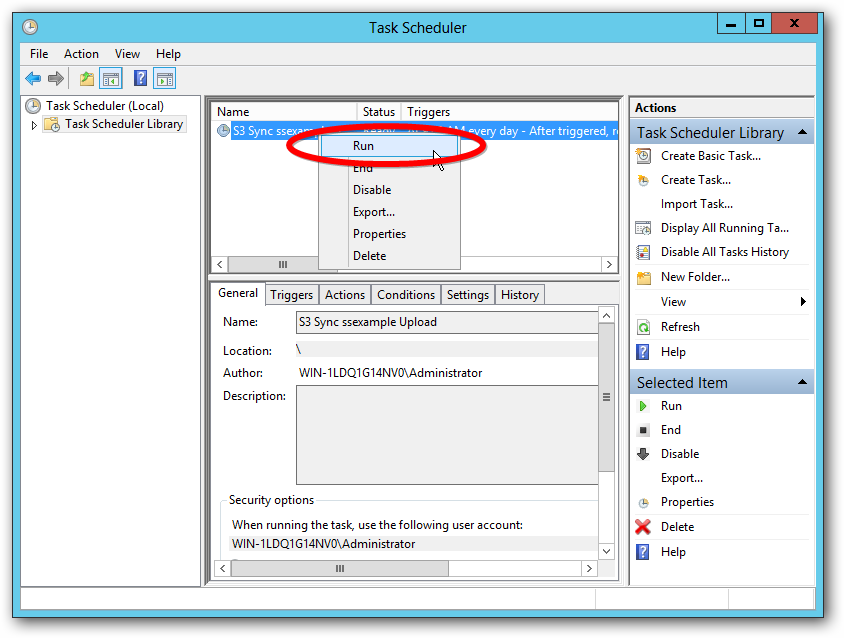
If the PowerShell script is run as a Scheduled Task, the task needs to be set with “Run with highest privileges”.
If you run the PowerShell script from the PowerShell command prompt, run the prompt as an administrator.

Using S3 Sync with Temporary Security Credentials

Amazon has a service called AWS Security Token Service which allows you to generate temporary credentials to access your AWS resources. SprightlySoft S3 Sync can be configured to use temporary credentials. The following article shows how to generate temporary credentials and use them with S3 Sync.

AWS Security Token Service is typically used by large organizations that do not want to manage many permanent AWS Identity and Access Management (IAM) users. These organizations will generate a temporary IAM user through STS that exists for only a few hours. An organization user will be able to use this IAM account for their required task. No extra work is required to expire the temporary account. To read more about Security Token Service see http://docs.aws.amazon.com/STS/latest/UsingSTS/Welcome.html

The organization will call the GetFederationToken function of the STS service to generate temporary security credentials. When calling this function the organization will choose how long the credentials are valid for. To read more about the GetFederationToken function see http://docs.aws.amazon.com/STS/latest/APIReference/API_GetFederationToken.html

The GetFederationToken function will return an AccessKeyId, SecretAccessKey, and SessionToken. These values can be used with S3 Sync to preform a file synchronization. Enter the AccessKeyId and SecretAccessKey and you normally would in the application. The SessionToken value needs to go in the RequestHeaders parameter in the format of “x-amz-security-token:[STSVALUE]”. When S3 Sync makes calls to Amazon it will add a x-amz-security-token header in every request. Amazon will validate the token in conjunction with the AccessKeyId and SecretAccessKey.

The following is an example of a S3 Sync command line using temporary credentials and a session token.

C:\Program Files (x86)\SprightlySoft\S3 Sync\S3Sync.exe" -AWSAccessKeyId xxxxxxxxxxxx -AWSSecretAccessKey xxxxxxxxxxxx -BucketName mybucket -SyncDirection Upload -LocalFolderPath "C:\myfolder" -LicenseKey xxxxxxxxxxxx -RequestHeaders "x-amz-security-token:xxxxxxxxxxxx"

Using a Batch File to Execute Commands After S3 Sync

You can use a batch file to execute commands after S3 Sync completes. Say you want to upload files to S3 then delete the local files if the upload was successful. The following batch file is an example of this process.

Upload files to S3 then delete local files.

C:\Program Files (x86)\SprightlySoft\S3 Sync\S3Sync.exe" -AWSAccessKeyId xxxxxxxxxxxx -AWSSecretAccessKey xxxxxxxxxxxx -BucketName mybucket -S3FolderKeyName "myfolder/" -SyncDirection Upload -LocalFolderPath "C:\myfolder" -DeleteS3Items true -LogOnlyMode false -OutputLevel 1 -CompareFilesBy Timestamp -LicenseKey xxxxxxxxxxxx -LogFilePath "C:\Temp\S3 Sync <BucketName> <S3FolderKeyName> <<yyyy-MM-dd HH.mm.ss>> <SyncDirection>.txt"

@if %ERRORLEVEL% neq 0 goto error

@echo S3 upload successful.
RMDIR "C:\myfolder" /Q /S
REM pause
exit 0

:error
@echo S3 upload error. Local delete not executed.
REM pause
exit 1
  • The first line in the script above uploads files with S3 Sync.
  • The %ERRORLEVEL% line checks the error level returned from S3 Sync. If the error level is not 0, the application skips the next block of code and goes to the :error section.
  • The @echo line writes a message to the console window.
  • The line with RMDIR deletes the local folder. This line will only be executed if error level from S3 Sync was 0 which means success.
  • The REM pause line would wait for the use to press a key to continue. The REM statement comments out the line and it will not be executed. Remove REM if you would like to test the script and want to be notified before continuing.
  • The exit 0 line exits the batch script with a success code. The remainder of the script will not be executed.
  • The :error line is a section marker of the script.
  • The @echo line writes a message to the console window.
  • The REM pause line can be uncommented during testing.
  • The exit 1 line exits the batch script with an error code.

The following is an example of downloading files with S3 Sync then deleting those files with S3 Delete. You can get S3 Delete for free at http://sprightlysoft.com/S3Delete/

Download files from S3 then delete files on S3.

"C:\Program Files (x86)\SprightlySoft\S3 Sync\S3Sync.exe" -AWSAccessKeyId xxxxxxxxxxxx -AWSSecretAccessKey xxxxxxxxxxxx -BucketName mybucket -S3FolderKeyName "myfolder/" -SyncDirection Download -LocalFolderPath "C:\myfolder" -DeleteLocalItems true -LogOnlyMode false -OutputLevel 1 -CompareFilesBy Timestamp -LicenseKey xxxxxxxxxxxx -LogFilePath "C:\Temp\S3 Sync <BucketName> <S3FolderKeyName> <<yyyy-MM-dd HH.mm.ss>> <SyncDirection>.txt"

@if %ERRORLEVEL% neq 0 goto error

@echo S3 download successful.
"C:\Program Files (x86)\SprightlySoft\S3 Delete\S3Delete.exe" -AWSAccessKeyId xxxxxxxxxxxx -AWSSecretAccessKey xxxxxxxxxxxx -BucketName mybucket -S3KeyName "myfolder/" -LogFilePath "C:\Temp\S3 Sync delete.txt" -OutputLevel 2
REM pause
exit 0

:error
@echo S3 download error. S3 delete not executed.
REM pause
exit 1
  • The first line in the script above downloads files with S3 Sync.
  • The %ERRORLEVEL% line checks the error level returned from S3 Sync. If the error level is not 0, the application skips the next block of code and goes to the :error section.
  • The @echo line writes a message to the console window.
  • The line with S3Delete.exe deletes the files from S3. This line will only be executed if error level from S3 Sync was 0 which means success.
  • The REM pause line would wait for the use to press a key to continue. The REM statement comments out the line and it will not be executed. Remove REM if you would like to test the script and want to be notified before continuing.
  • The exit 0 line exits the batch script with a success code. The remainder of the script will not be executed.
  • The :error line is a section marker of the script.
  • The @echo line writes a message to the console window.
  • The REM pause line can be uncommented during testing.
  • The exit 1 line exits the batch script with an error code.

To use the batch files above copy the code an place them in a text file using a tool such as Notepad. Change the parameters such as AWSAccessKeyId to your values. Save the file with a .bat extension. An example of the file name is “DownloadThenDelete.bat”. You can double click the bat file to execute it.

S3 Sync and Server-Side Encryption

S3 Sync now supports server-side encryption using Amazon KMS-Managed Keys and Customer-Provided Keys. Server-side encryption is the process where Amazon encrypts files after you upload them. If you provide the correct credentials when retrieving a file, Amazon decrypts the file and returns it to you. Server-side encryption makes storing files on Amazon more secure.

Server-Side Encryption using AWS KMS-Managed Keys (SSE-KMS)

Amazon allows you to generate encryption keys within Amazon and specify which encryption key to use when uploading a file. This method is called AWS KMS-Managed Keys. You specify the ID of the encryption key to use when uploading a file. When downloading a file you must specify the same ID of the encryption key. You generate and manage encryption keys through the Identity and Access Management service which is accessible through the AWS web management console. If someone gets access to your S3 bucket they will not be able to retrieve a file unless they specify the correct ID of the encryption key. When managing encryption keys through the Identity and Access Management service you can delegate encryption key administrators and  encryption key users. These are the users that will be able to encrypt data, decrypt data, and manage encryption keys. When using SSE-KMS, AWS CloudTrail is available. CloudTrail keeps and audit history of who used an encryption key and when.

To use SSE-KMS in S3 Sync you will need to use the UploadHeaders parameter. The following is an example of this parameter.

-UploadHeaders “x-amz-server-side-encryption:aws:kms|x-amz-server-side-encryption-aws-kms-key-id:c112fc98-2e5d-4eab-aebc-0f565aa7e6fc”

The x-amz-server-side-encryption section tells S3 you will be using SSE-KMS. The x-amz-server-side-encryption-aws-kms-key-id section tells S3 which encryption key to use for the operation. You can get the key ID for an encryption key you generated in the AWS web management console under the Identity and Access Management service.

Note: The UploadHeaders parameter applies to upload, download, and bidirectional syncs in S3 Sync.

Server-Side Encryption using Customer-Provided Keys (SSE-C)

Amazon allows you to generate your own encryption key and send that key to S3 when uploading a file. Amazon will encrypt the file with your encryption key after it receives it. Amazon will then discard the key. When requesting the file you must include the same encryption key that was sent when uploading the file. Amazon will decrypt the file and return it to you. The benefit here is that Amazon does not store the encryption key so there is no way for someone with access to your account to retrieve a file. The drawback is you need to securely store your encryption keys locally. If you loose your keys you cannot retrieve your files.

The following is an example of the S3 Sync RequestHeaders parameter for using SSE-C.

-RequestHeaders “x-amz-server-side-encryption-customer-algorithm:AES256|x-amz-server-side-encryption-customer-key:Qi1sHpQnppeJAo5WyM8w/BGJXJmTO/LBg6dcjThY6nM=|x-amz-server-side-encryption-customer-key-MD5:IcpiSupe46fQ0fb5AGQ2RQ==”

The x-amz-server-side-encryption-customer-algorithm section says you will be using the AES 256 encryption method on S3. The x-amz-server-side-encryption-customer-key section is the encryption key. The x-amz-server-side-encryption-customer-key-MD5 section is the MD5 hash of the encryption key. Amazon will store the x-amz-server-side-encryption-customer-key-MD5 value with the file but not the x-amz-server-side-encryption-customer-key value.

The following is code to generate an encryption key and it’s MD5 hash in C#.

System.Security.Cryptography.AesManaged MyAesManaged = new System.Security.Cryptography.AesManaged();
MyAesManaged.GenerateKey();
String CustomerKey = Convert.ToBase64String(MyAesManaged.Key);

System.Security.Cryptography.MD5 MyMD5 = System.Security.Cryptography.MD5.Create();
Byte[] MD5Bytes = MyMD5.ComputeHash(MyAesManaged.Key);
String CustomerKeyMD5 = Convert.ToBase64String(MD5Bytes);

To read more about server-side encryption see http://docs.aws.amazon.com/AmazonS3/latest/dev/serv-side-encryption.html

How to Create a Scheduled Task to Automate S3 Sync

Microsoft Windows has a built in task scheduler. It allows you to automatically run a program at a certain time. Task scheduler is great for automating backups. You can configure a task to send files to Amazon S3 using SprightlySoft S3 Sync. The following article will take you step by step through the process of creating a scheduled task to automatically upload files Amazon S3.

First run the S3 Sync Command-Line Wizard to build a S3 Sync command line. Enter your parameters of which folder you want to upload and which S3 bucket you want to save files to. When all your parameters are entered you will arrive at the Command-Line tab in the wizard. This screen allows you to save the command line to a batch file. Click the Save Command-Line button.


In the Save As dialogue box enter a name for your batch file.


Now that your batch file is saved you can double click it to run the command-line. This makes it easier to run S3 Sync. However in some situations you may want to run the command-line often and you do not want to click the batch file each time. This is where Windows Task Scheduler comes in handy. You can create a task to run the batch file once an hour. The following shows how to create a scheduled task.

In Windows go to the Control Panel. Under System and Security you will see Administrative Tools. Click it to see the administrative tools.


Under Administrative Tools click Task Scheduler.


The Task Scheduler screen will open up. Right click in the main area and click Create New Task.


Enter a name for your scheduled task. You will need to select the user the task runs under. It can be your account or another account. It’s best to select “Run whether user is logged on or not” so the task will run even if the user is not logged in. Click OK when you are complete.


In the Create Task screen click on the Triggers tab and click the New button.


On the New Trigger screen select how often the task will run. In the example below the trigger is set to run once an hour. You can choose different settings for your task if you’d like.


When you are finished with your trigger go to the Actions tab on the Create Task screen. Click the New button.


Under Program/script select the batch file you created earlier. Click the OK button when complete.


The settings for your new task are now entered. Click the OK button to create the task. You may be prompted to enter the password of the user the task runs under. Enter the password to continue.


You will now see the task in the Task Scheduler. To confirm the task is configured correctly right click on it and click Run. The Task Schuler will execute the batch file which will run S3 Sync with your settings. View the S3 Sync log to make sure S3 Sync ran correctly.


With the scheduled task configured you can relax and know your files will automatically be backed up to Amazon S3.

How to use Amazon Glacier in S3

Amazon Glacier is a service that allows you to archive your files on Amazon’s cloud infrastructure. It is designed for large files that are accessed infrequently such as video and picture backups.

The main advantage of Glacier is the price. It costs $1 for 100 GB of storage space per month. This is 88% cheaper than the cost of standard storage on S3 and 85% cheaper than reduced redundancy storage on S3.

The main drawback to Glacier is that your files are not immediately available on request. It take 3 – 5 hours between the time you initiate a download request, and the time a file is made available for download.

There a 2 ways to take advantage of Amazon Glacier; you can use the Amazon Glacier service or you can use the Glacier storage class in Amazon S3. SprightlySoft recommends that you use the Glacier storage class in Amazon S3 for the following reasons:

  • When using the Glacier storage class in S3 you can use the S3 web management console to view and manage files. The Amazon Glacier service does not have a web interface and it’s more difficult to list and manage files.
  • It takes a long time to list files with the Amazon Glacier service. You list files by initiating an inventory job. This job takes up to 24 hours to complete. With S3 you can list files immediately even if they are in the Glacier storage class.
  • Files stored in S3 using the Glacier storage class can be managed by any application that works with S3 and the Glacier storage class. When you store files in the Amazon Glacier service there is no standard way to store information such as file name. Each application that stores information stores it differently and this causes compatibility issues between applications.

To read more about using S3 and the Glacier storage class see http://aws.amazon.com/s3/faqs/.

To use the Glacier storage class in S3 you configure a lifecycle rule that moves files to the Glacier storage class. The easiest way to configure this rule is through the S3 management console. The following describes how to do this.

Enter the bucket where you want to use the Glacier storage class and click the Properties button.


Click the Lifecycle option.


Click the Add rule button.


In the Lifecycle Rule dialog click the Apply to Entire Bucket checkbox to make this rule apply to all files in the bucket. Next click the Move to Glacier button to get the Glacier options. In the Time Period field enter 0 to make files immediately go to the Glacier storage class. Click the Save button to apply the rule to your bucket.


You now have a lifecycle rule that pushes files to the Glacier storage class. Don’t worry if files stay in their previous storage class for a while. It may take up to a day for the files to be moved over and for the new storage class to be displayed in the web management console.

You can use SprightlySoft S3 Sync to upload files to a bucket with a Glacier lifecycle rule and to download files from the Glacier storage class. When S3 Sync encounters a file in the Glacier storage class it will make a request to retrieve the file. S3 Sync will wait until the file is available and when it is ready, it will be downloaded.

Give it a try today and reduce your S3 storage costs by using the Glacier storage class.

Restricting an IAM User to a Sub Folder in Amazon S3

Do you want to use multiple IAM users with a single S3 bucket but don’t want the users to access each other’s files? You can craft a S3 bucket policy to limit a user to a specific S3 sub folder. The following will show you how to create a bucket policy and use SprightlySoft S3 Sync to work with that sub folder.

First find the User ARN of the user you want to restrict access to. You can find this in the AWS Management Console. Below is a screen shot of User ARN for a user called myuser.

Next go to the properties bucket you want to use in the AWS Management Console. In this example we will use a bucket called bucketwithpolicy. On the properties page click “Add bucket policy”.


Below is the bucket policy to restrict the myuser user to a folder called subfolder/ in the bucketwithpolicy bucket. You will need to replace the user ARN, bucket name, and sub folder name if you would like to use the policy.

{
  "Statement": [
    {
      "Sid": "myuserBucketActions",
      "Action": [
        "s3:GetBucketLocation",
        "s3:ListBucketMultipartUploads"
      ],
      "Effect": "Allow",
      "Resource": "arn:aws:s3:::bucketwithpolicy",
      "Principal": {
        "AWS": [
          "arn:aws:iam::657267205342:user/myuser"
        ]
      }
    },
    {
      "Sid": "myuserListBucket",
      "Action": [
        "s3:ListBucket"
      ],
      "Effect": "Allow",
      "Resource": "arn:aws:s3:::bucketwithpolicy",
      "Condition": {
        "StringLike": {
          "s3:prefix": "subfolder/*"
        }
      },
      "Principal": {
        "AWS": [
          "arn:aws:iam::657267205342:user/myuser"
        ]
      }
    },
    {
      "Sid": "myuserObjectActions",
      "Action": [
		"s3:AbortMultipartUpload",
		"s3:DeleteObject",
		"s3:GetObject",
		"s3:GetObjectAcl",
		"s3:PutObject",
		"s3:PutObjectAcl"
      ],
      "Effect": "Allow",
      "Resource": "arn:aws:s3:::bucketwithpolicy/subfolder/*",
      "Principal": {
        "AWS": [
          "arn:aws:iam::657267205342:user/myuser"
        ]
      }
    }
  ]
}

In the policy above the first statement allows the user to execute the GetBucketLocation and ListBucketMultipartUploads commands on the bucket.

The next statement allows the user to list files in the bucket where the prefix is subfolder/.

The last statement allows the user to perform actions within the sub folder within the bucket.

To read more about bucket policies see http://docs.aws.amazon.com/AmazonS3/latest/dev/AccessPolicyLanguage_UseCases_s3_a.html

Take the bucket policy you created and enter it in the AWS Management Console.


Now that your bucket policy is applied, the user has access to the sub folder within the bucket. The user can not use S3 Sync to upload or download files from that sub folder. The user will not be able to access any other folder in the bucket.

Below is a screen shot of configuring S3 Sync using the command line wizard.

The command line to run S3 Sync will be similar to the one below.

"C:\Program Files (x86)\SprightlySoft\S3 Sync\S3Sync.exe" -AWSAccessKeyId xxxxxxxxxxxxxxxxxxxx -AWSSecretAccessKey xxxxxxxxxxxxxxxxxxxxxxxxxxxxxxxxxxxxxxxx -BucketName bucketwithpolicy -S3FolderKeyName subfolder/ -SyncDirection Upload -LocalFolderPath C:\Temp\bucketwithpolicy\subfolder

When the user runs the S3 Sync command line their files will be transferred.

S3 Sync v4 Supports Restore from Glacier

S3 Sync version 4 has been released. The latest version supports downloading files that have been moved to the Glacier storage class. Amazon Glacier is a file archiving service. Storing a file in Glacier costs 1/10th the cost of storing it in S3. The drawback of Glacier is that if you want to retrieve a file you need to put in a request and wait up to 5 hours before the file becomes available. 

You can use a S3 lifecycle policy to move files from S3 to Glacier. Create a S3 lifecycle policy through Amazon’s AWS Management Console web application.  When creating a lifecycle policy you can set the number of days before a file on S3 is moved to Glacier. Amazon does the work of monitoring this policy and moving files when required.

When a file is moved to Glacier it can no longer be downloaded through the Internet. It needs to be restored before it can be retrieved. The latest S3 Sync can detect if your files are on the Glacier storage class and it makes a request to restore them if required. The application waits until the restore is complete then downloads the files.

Glacier is great for backing up large files that you do not need immediate access to. For example backing up videos on S3 is expensive because the files are large. You usually only need to retrieve the files if your local copy is lost. When you store the files on Glacier the cost is low and the files can be available within few hours.

Try the latest version of S3 Sync and see how easy it is to restore files from Glacier.

Amazon Endorses the SprightlySoft AWS Component

SprightlySoft is pleased to announce that Amazon has recommended the SprightlySoft AWS Component for .NET to developers looking to interact with Amazon Route 53.  The endorsement is included in the Amazon Route 53 Getting Started Guide.  See http://docs.amazonwebservices.com/Route53/latest/GettingStartedGuide/WhereGoFromHere.html for details.

Amazon Route 53 is a scalable Domain Name System (DNS) web service.  You would use it to point your domain names to the Amazon services you use.  When using Amazon web services you are continually bringing computers online and taking them offline.  You need to update your domain names quickly to reflect these changes.  Amazon Route 53 allows you to programmatically make changes to your domain name configuration.  Route 53 is also super quick and can handle massive amounts of users using your services.

The SprightlySoft AWS Component allows Microsoft developers to quickly and easily create applications that interact with Amazon Route 53.  The component includes sample code in C# and VB.NET for all Route 53 functions.  Best of all it is completely free to use.

SprightlySoft hopes many developers will find the component useful and looks forward to building more great applications that use Amazon web services.

Amazon S3 Multipart Uploads

Sample code for Amazon S3 multipart uploads has been added to the SprightlySoft AWS Component for .NET.  Multipart uploads is a new feature in S3 that allows you to upload a file in parts.  When all the parts have been uploaded you tell S3 to reassemble all the parts into the original file.  Some of the benefits of multipart uploads are:

  • Ability to resume an upload.  Previously if an upload failed you needed to restart the upload from the beginning.  If you uploaded 800 MB of a 900 MB file and your Internet connection was interrupted, you need to re-upload the entire file again.  With multipart uploads you upload the file in 5 MB chunks.  When a chunk is complete it sits on S3 until you are ready to complete the upload.  If your Internet connection goes down while you are uploading only the current chunk you are working on is lost.  You resume uploading from the last complete chunk on S3.
  • Concurrent uploads.  With multipart uploads you can have multiple threads uploading different parts of the same file to S3 at the same time.  You may see increased transfer speed when uploading this ways and quicker speed mean a faster upload.
  • Large object support.  Amazon S3 recently increased the maximum size of a file on S3 from 5 GB to 5 TB.  5 GB may seem like a lot but there are cases where people need to store larger files.  For example a Blu-ray movie may be 50 GB and a 2-hour uncompressed 1080p HD video is around 1.5 terabytes.  Before large object support you would need to break large files into smaller parts before sending them to S3 and reassemble them after you download the parts from S3. 

You can find the multipart uploads examples in the S3AllOperations project with the SprightlySoft AWS Component for .NET.  There is sample code in C# and VB.NET.  The component is free so give it a try.