Microsoft Windows has a built in task scheduler. It allows you to automatically run a program at a certain time. Task scheduler is great for automating backups. You can configure a task to send files to Amazon S3 using SprightlySoft S3 Sync. The following article will take you step by step through the process of creating a scheduled task to automatically upload files Amazon S3.
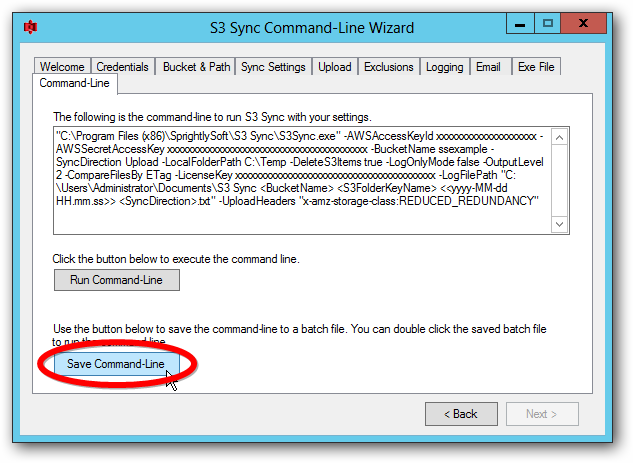
First run the S3 Sync Command-Line Wizard to build a S3 Sync command line. Enter your parameters of which folder you want to upload and which S3 bucket you want to save files to. When all your parameters are entered you will arrive at the Command-Line tab in the wizard. This screen allows you to save the command line to a batch file. Click the Save Command-Line button.
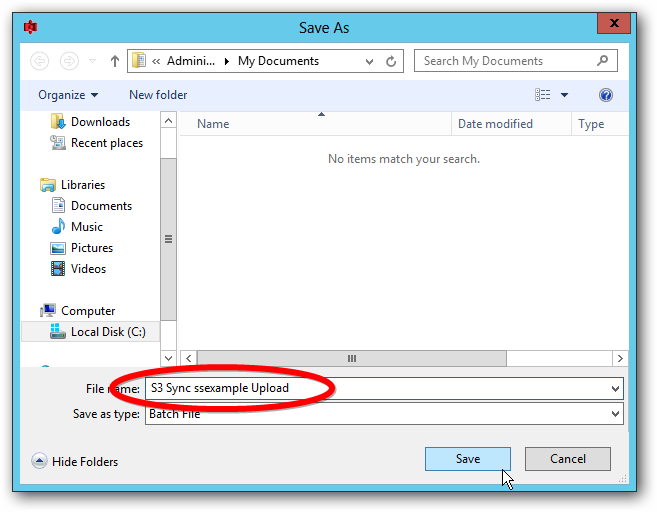
In the Save As dialogue box enter a name for your batch file.
Now that your batch file is saved you can double click it to run the command-line. This makes it easier to run S3 Sync. However in some situations you may want to run the command-line often and you do not want to click the batch file each time. This is where Windows Task Scheduler comes in handy. You can create a task to run the batch file once an hour. The following shows how to create a scheduled task.
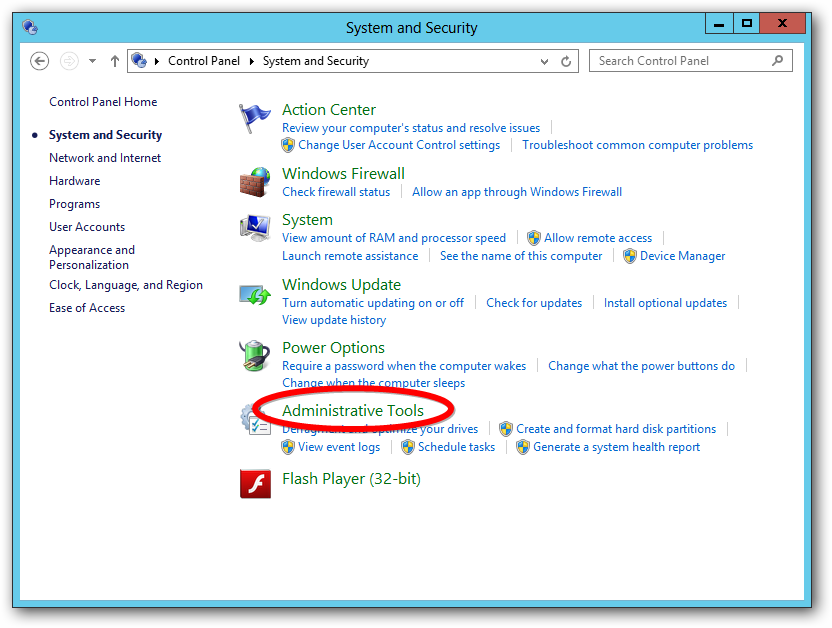
In Windows go to the Control Panel. Under System and Security you will see Administrative Tools. Click it to see the administrative tools.
Under Administrative Tools click Task Scheduler.

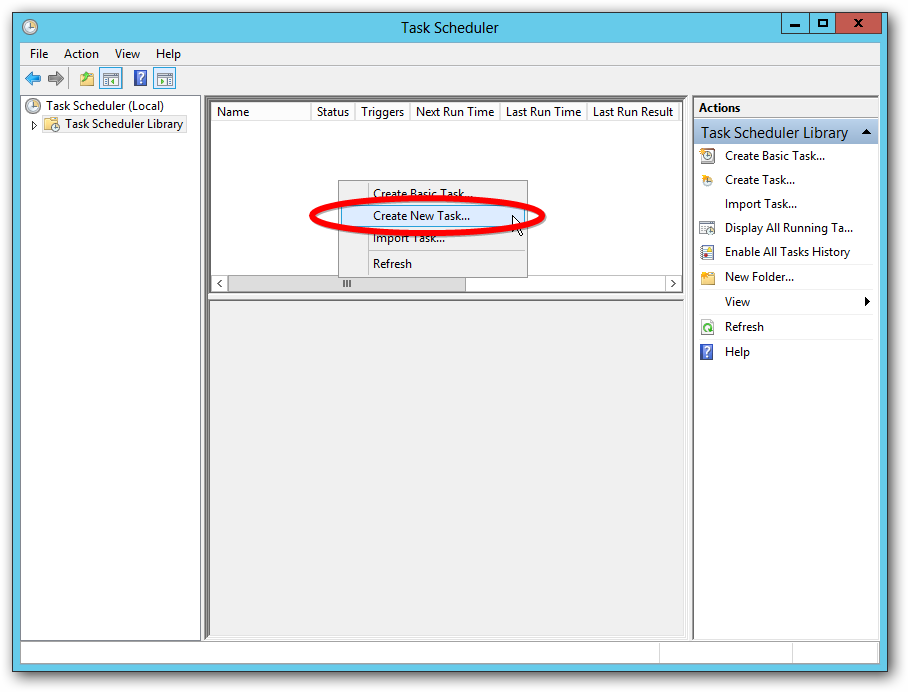
The Task Scheduler screen will open up. Right click in the main area and click Create New Task.
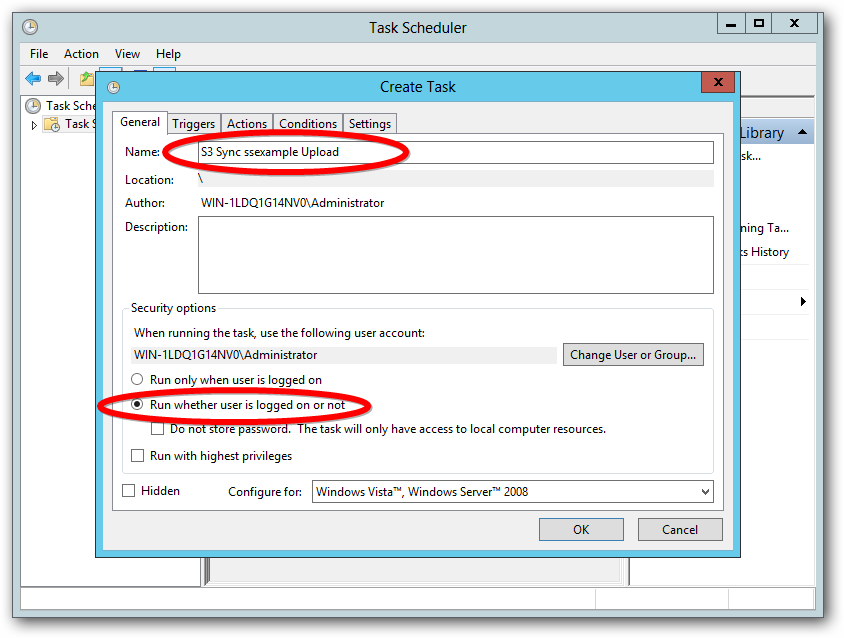
Enter a name for your scheduled task. You will need to select the user the task runs under. It can be your account or another account. It’s best to select “Run whether user is logged on or not” so the task will run even if the user is not logged in. Click OK when you are complete.
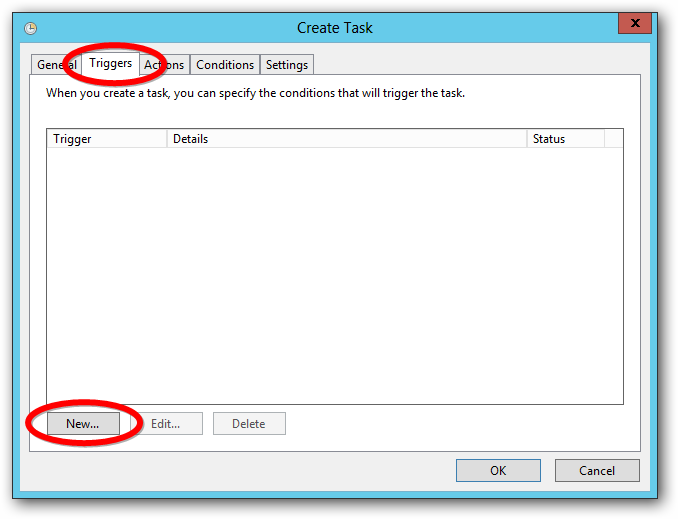
In the Create Task screen click on the Triggers tab and click the New button.
On the New Trigger screen select how often the task will run. In the example below the trigger is set to run once an hour. You can choose different settings for your task if you’d like.

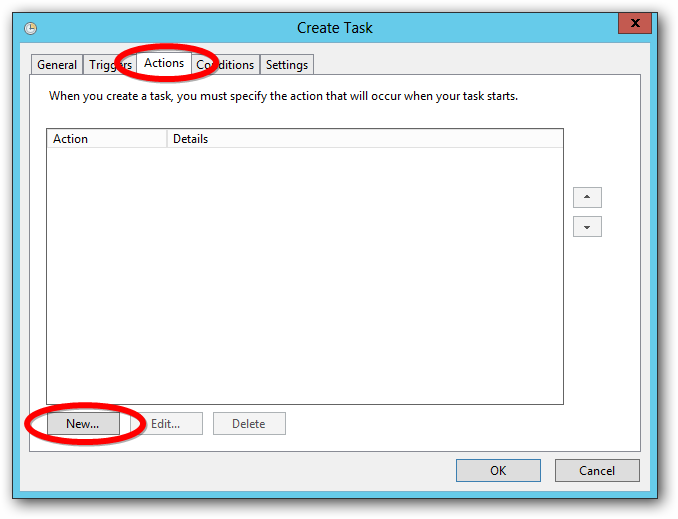
When you are finished with your trigger go to the Actions tab on the Create Task screen. Click the New button.
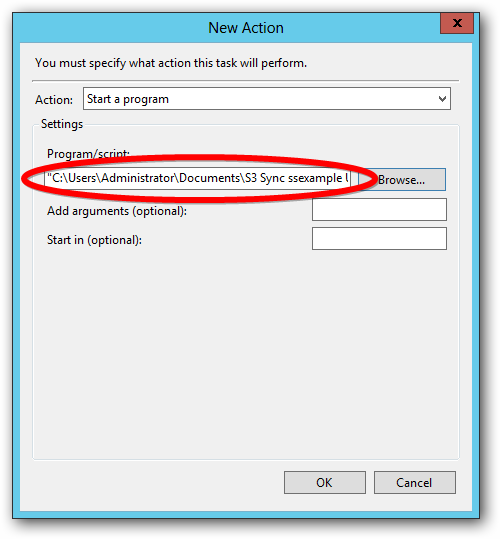
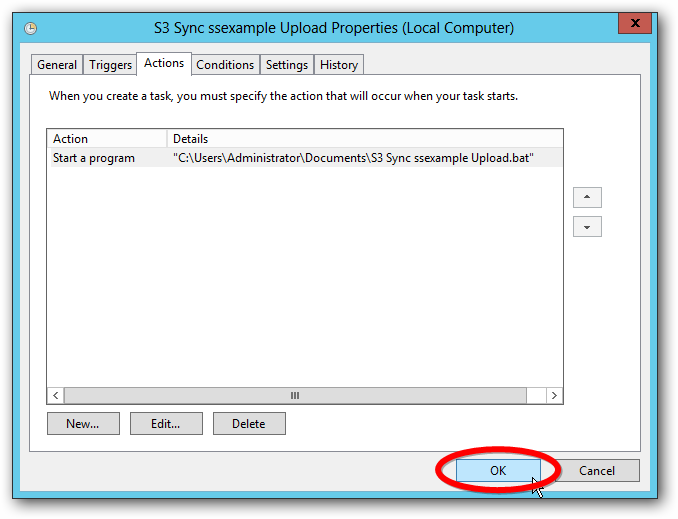
Under Program/script select the batch file you created earlier. Click the OK button when complete.
The settings for your new task are now entered. Click the OK button to create the task. You may be prompted to enter the password of the user the task runs under. Enter the password to continue.
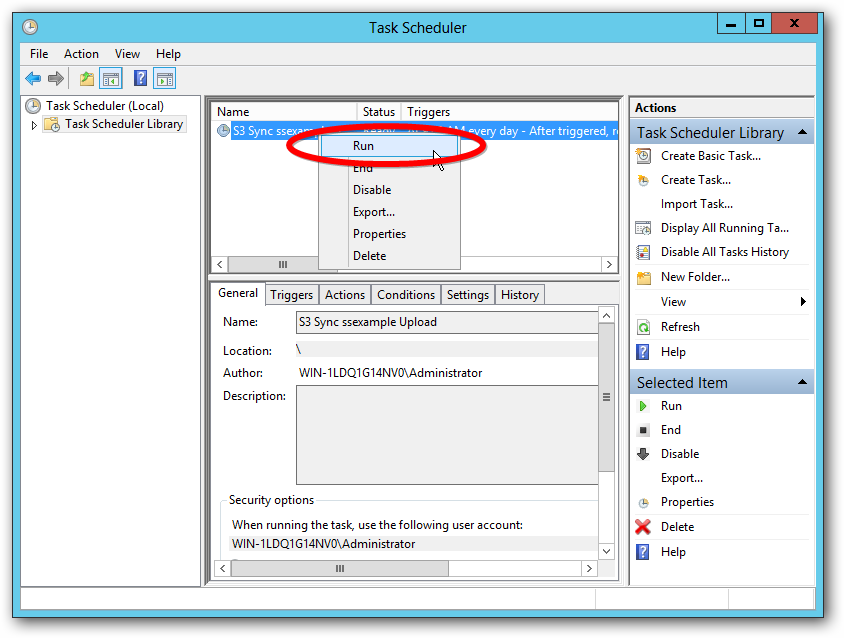
You will now see the task in the Task Scheduler. To confirm the task is configured correctly right click on it and click Run. The Task Schuler will execute the batch file which will run S3 Sync with your settings. View the S3 Sync log to make sure S3 Sync ran correctly.
With the scheduled task configured you can relax and know your files will automatically be backed up to Amazon S3.